 Auto
Auto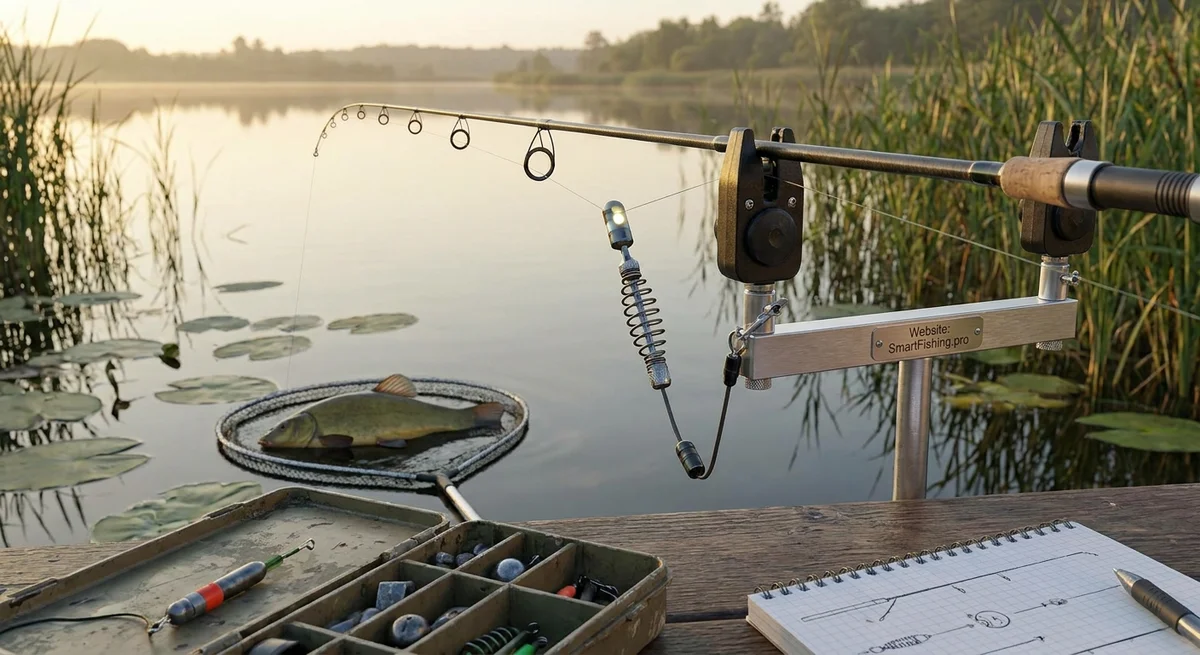
Understanding Bite Indicators for Tench Fishing
Fish communicate with subtle tugs and pulls. Tench are known to be careful biters, so anglers use bite indicators – devices that turn tiny fish movements into clear signals. Examples are quiver tips (flexible rod tips) and spring bobbins (weighted clips on the line). By adjusting line angle, indicator weight, and line tension, we can tune these setups so that real bites show up loud and false triggers (like wind or weed) stay quiet. Below we explore how these factors work together in June conditions, how to calibrate them, and how to set up for reliable bite detection.
How Fish Movement Becomes a “Bite”
When a fish nibbles or pulls, that movement must travel along the fishing line to our indicator. The transfer depends on the line’s angle, the slack or tightness of the line, and what’s on the end of the line (like weights or bait).
- Line Angle: If your rod is pointed directly at the lead (sinker) on the bottom, the line is straight. In this case, even a slight tug goes straight to the tip and indicator. But if the rod is at an angle to the line, a small tug first bends the rod instead of going straight to the indicator (www.anglingactive.co.uk). In practice, align the rod and line so bites aren’t “dampened” by the rod tip (www.anglingactive.co.uk).
- Line Tension (Slack vs. Tight): A very slack line means the bobbin or indicator hangs loosely. When a fish takes line on a slack rig, the indicator will move sharply as soon as any line is pulled. This exaggerates tiny bites. With a tight line, the line is always straight and under tension; then fish pulls are felt immediately through the rod tip or alarm. Experts note that slack lines work best with very light indicators, while tight lines call for stiffer indicators or heavier weights (duohook.ie).
- Line Material: The type of line affects sensitivity. Braided line (PE) and high-modulus lines transmit vibrations better than soft nylon (fishing.sunline.co.jp) (fishing.sunline.co.jp). A stiff, low-stretch line will relay even small movements up to the rod tip faster. (Nylon stretches more and soaks up a gentle tug.) In short, use a sensitive, low-stretch line to help turn fish tugs into noticeable tip movement.
Quiver Tips vs. Spring Bobbins
Quiver tips are thin fibreglass or carbon extensions on the rod. They bend easily under light signals. A very light quiver tip will “jump” at tiny tugs, making bites obvious (www.drennantackle.com). In contrast, a stiffer tip resists bending until a stronger tug pulls gradually. For example, one tench angler suggests using the lightest tip possible on calm days close to shore – this makes even the smallest bite bend the tip noticeably (www.drennantackle.com). If you must fish in heavy flow or far out, switch to a heavier tip and use techniques like a “drop-back” rig, where you watch the tip snap back when tension is released (www.drennantackle.com). In essence:
- Soft tip (low ounce rating) → Very sensitive. Good for quiet conditions when you want to see every tiny bite (www.drennantackle.com).
- Hard tip (high ounce rating) → Lower sensitivity. Good for strong currents or long casts where slack line is inevitable (www.drennantackle.com).
Spring bobbins are weighted clips that hang from the rod or rest below the reel. They often use a metal spring so the weight can move freely. The weight of the bobbin is key: a heavy bobbin (e.g. tungsten 20g) won’t move much on a light bite, but it won’t be blown by the wind either (duohook.ie) (duohook.ie). A light bobbin (e.g. 4g) will flick with any slack-line tug, great for slack-line rigs (duohook.ie). As one guide puts it, “If you fish with slack lines, use a lightweight bobbin… so the bobbin has to move as soon as there is any line movement” (duohook.ie). On the other hand, “for long range or tight lines, use… a heavy bobbin or stiff quiver arm” (duohook.ie).
The hanger length (how far the weight hangs below the spring) also matters. A longer hanger gives more leverage: a small upward pull moves the weight more. A shorter hanger is less twitchy. Adjust this based on how sensitive you need the bobbin to be. (If you’re not sure, try a spring bobbin on a bench and extend or shorten it to see how it changes the movement.)
Bench-Calibrating Your Bite Indicators
To make bite indicators truly reliable, we can calibrate them under controlled conditions using known weights and distances. This means testing exactly how much fish-like pull is needed to move the tip or bobbin. Here’s a simple way:
-
Set Up a Test Rig: Secure your fishing rod horizontally (clamped in a vise or holder). Attach your quiver tip or bobbin setup as you would on the bank. Keep the reel’s bale open and line free. Place a measuring tape or stick near the rod tip or bobbin to gauge movement.
-
Use Known Weights: Tie a small, known weight (e.g. 10g, 20g, 50g) to the end of your line. Pull gently on the line or let the weight hang. Watch how the indicator reacts. For example, start with 10g at 5–10 meters out. Does the tip bend or the bobbin rise/fall? Note how far it moves.
-
Vary Tension and Angle: You can simulate different lengths of pulled line by reeling or letting line out. Also try adjusting the rod angle to change line angle. Each change will alter how the indicator moves. By using the same weights and distances, you create a calibration chart: e.g. “20g at 10m causes tip to bend 5 degrees and bobbin drops 2 cm.”
-
Measure and Mark: Mark reference points on the tip or bobbin travel if needed. For instance, put a small sticker on the quiver tip and on the spring; when you apply a known pull, note where they move to. Over time, you’ll know that “a hookpull of X grams made the tip drop to my mark,” giving you confidence that real fish tugs of that strength would produce a visible signal.
-
Repeat for Different Setups: Bench-test each combination you plan to use. Try light vs. heavy bobbins, short vs. long hanger, and different tip strengths. Record which configurations give the clearest movement for a given weight. In June, when tench are active, you may prefer the setup that registers even subtle 10–20g tugs on a slack line, or the one that will resist a little ripple but react to a firm bite.
By calibrating this way, you turn guesswork into measured performance. For example, if you find that a 50g pull only barely moves a 4oz tip, you know that fish will need to take a lot of line to bend that tip – and tiny nibbles might not be seen. You could switch to a lighter tip. Or if a 10g pull sends a 6g bobbin all the way up, you might need a slightly heavier bobbin to avoid false drops from wind.
Reducing False Signals
False indications come from wind, current, or the bobbin slapping against the rod. Here are ways to minimize them:
-
Align Rod and Line: As mentioned, keep the rod pointed straight at the lead. This avoids creating a “first bump” at the tip when the line moves. Angling the rod can “absorb” a light tug. A source advises: “For optimum bite detection, ensure your rod is pointing in the same direction your line is going out” (www.anglingactive.co.uk). In practice, that means position the rod so the line comes off the tip in a straight line.
-
Set Alarm Sensitivity Correctly: If you use an electronic bite alarm, set it as sensitive as conditions allow (duohook.ie) (www.delkim.co.uk). Too high sensitivity will beep at every wave; too low will miss light bites. Alarm makers like Delkim note that you should “set Response [sensitivity] as high as possible according to conditions and set up,” but dial it back if you see lots of false alerts (www.delkim.co.uk). Also adjust for line weight – a heavier bobbin or your bite indicator adds pull, so you may need to increase alarm sensitivity to compensate (www.delkim.co.uk).
-
Use Line Clips and Angle Tricks: Some anglers place the line in a clip on the rod so the bobbin hangs straight down. This adds angle and makes the bobbin move more with any slack-taking movement (duohook.ie). A more dramatic angle between bobbin and reel give clearer indication. In effect, you’re creating a slight downward tug point that exaggerates any pull.
-
Manage Slack: If the line is too slack, normal drift can move the bobbin. If it’s too tight, you might miss the subtle “give” that signals a bite. A common setup is to clip the line on the reel or use a small slip bobbin so you have a little slack – just enough that the bobbin hangs but won’t jiggle on its own. Always cast carefully to leave minimal slack in strong wind or current.
-
Avoid Unnecessary Attachments: Extra clips or back-leads (weights on the bottom of the line) can act as pivot points. A pivot means the tip must move more before the line actually pulls. A guide warns that backleads create another pivot, reducing sensitivity (duohook.ie). Use them only if you need the line to stay on the bottom.
-
Weigh Down Only If Needed: A bobbin or swinger should be just heavy enough. In warm June waters, tench often pick up bait gently. A very heavy indicator might not move at all until the fish has moved a lot of line. On the other hand, a very light bobbin could bounce in waves or snag on weeds. Find a weight that shows real bites without waving in the breeze. As one tip suggests, if any bobbin over 3–4 oz is needed to hold it steady in current, it might be better to use a bolt rig instead (where the weight sits on the bottom) (www.drennantackle.com), keeping slack-line rigs only for calmer conditions.
Practical June Setups
Putting it all together for summer tench:
- Slack-Line Bobbin Setup: If the wind is mild, try a slack-line bobbin rig. Use a soft rod (light ferrule, near side, short distance) with a very light tip (around ½–¾ oz) and a light bobbin (e.g. tungsten 4–6 g). This makes even tiny tugs spring the bobbin. Clip the line to match the spring angle. Calibrate so that 10–20 g of pull (a small tench nibble) moves the bobbin clearly, but normal ripples do not.
- Tense-Line Quiver Setup: If there’s chop or weeds, go the other way: cast a bit further or use a hamper, so your line stays pretty tight. Fit a stiffer tip (1–2 oz or more) and a heavier bobbin (10–15 g). In this setup the tench bite might come as a drop-back: a tench takes slack, then as it moves, all the tension is released at once, flipping the tip back or dropping a bobbin. Bowler’s notes on predator fishing apply: a bite releases tension and the quiver tip “flies backwards,” signalling the bite (www.drennantackle.com).
- Alarm and Rod: Always ensure the rod is pointed toward the lead/bead. If you use an alarm, set its sensitivity high but test for false alarms. Remember that environmental factors (wind, current) require readjustment of the indicator weight and alarm together (www.delkim.co.uk). If the bobbin bobs without fish, try a bit more weight or less slack, or add a small amount to the spring coil.
By bench-testing in advance and tweaking your setup on the bank, you’ll know exactly which adjustments cause your tip or bobbin to react. That way, when a cautious June tench takes the bait, the movement travels along the line and makes a clear signal – not a false alarm.
Conclusion
Bite detection is a game of balance. Line angle, indicator weight, and tension together form a simple mechanical transfer system: the fish’s tug (input) jumps the line, and the tip or bobbin (output) reacts. By aligning rod and line, choosing the right tip stiffness, and fine-tuning bobbin weight and hanger length, an angler can amplify real bites and dampen distractions. Manufacturers and coaches emphasize adjusting sensitivity to match line tension and setup (www.delkim.co.uk) (duohook.ie). In practice, calibrate your indicators with known weights (to know exactly how much bite is needed) and then set up for the day’s conditions. The result: clear quiver or bobbin movement only when there’s a genuine tench bite, not because of a breeze or tangle.