 Auto
Auto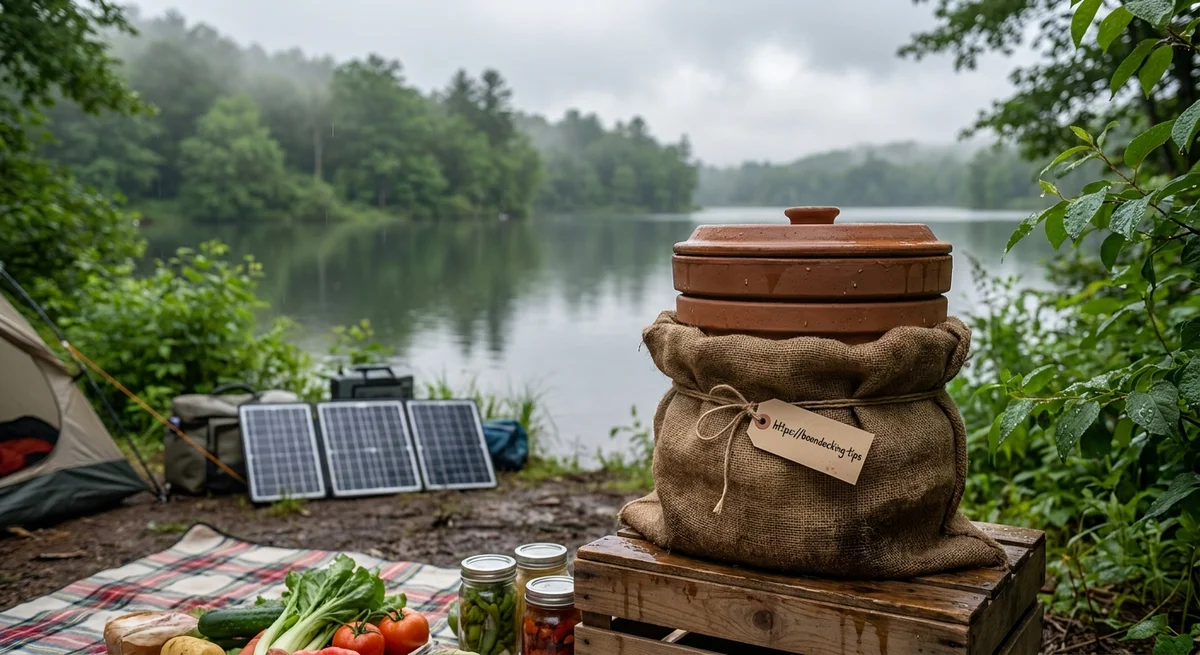
Food Refrigeration Off-Grid at Humid Lakeshores
Keeping food cold without AC power by a humid lakeside is a challenge. High humidity and shade mean moisture, mold, and sluggish cooling if equipment isn’t managed well. In such environments, 12V compressor refrigerators and absorption (gas/12V) units behave very differently. Compressor fridges run quietly off batteries (or solar) but use more electricity; absorption fridges can run on propane or 12V but require careful setup. We compare these systems under damp, shady conditions, discuss ventilation and leveling needs, and show how to estimate 12V battery draw in varying temperatures. We also cover smart packing (adding thermal mass) to reduce power spikes, plus food-safety rules, fish-handling guidelines, and fallbacks like coolers with ice. Finally, a maintenance checklist helps keep your off-grid fridge happy in the damp. Throughout, we follow authoritative guidance to keep perishables safe and equipment working reliably.
Compressor vs. Absorption: Pros and Cons
12V Compressor Refrigerators
A 12V compressor fridge (like a portable van or marine fridge) works like a household fridge: a compressor circulates refrigerant and does not rely on gravity or liquids inside. In practice these are more efficient* and cooling is steady even at high ambients (www.nkc.nl). Modern DC compressor fridges (often 12 V or 24 V) are designed for off-grid use, running on batteries (and solar or vehicle) with duty-cycle control. They cool quickly to the set temperature and can reach near-freezing in a freezer compartment. Noise is a mild humming when the compressor runs. Crucially, compressor units do not need to be perfectly level (they can sit tilted) and they typically have rear coils or internal condensers; they only need enough airflow around the coils to shed heat. In a lakeside shed or camper, ensure the fridge is not packed tightly against walls so the back has some ventilation.
Drawbacks: Compressor fridges do use electricity. A rule-of-thumb is a small (~25 L) unit might draw on the order of 20–30 amp-hours per day in mild (70–80°F) conditions (www.autoroamer.com). On very hot days (90–110°F ambient), draw can rise steeply – roughly doubling or more in load (www.autoroamer.com) (www.autoroamer.com). For example, one analysis shows a 25 L fridge drawing about 200–300 watt-hours (≈16–24 Ah) per day at around 75°F, but nearer 24 Ah per day at 110°F (www.autoroamer.com). Mid-size (45 L) units might draw 320–520 Wh/day (≈26–42 Ah) across warm-to-hot conditions (www.autoroamer.com). Precise consumption varies by model, thermostat setting, and load, but in general compressor fridges crucially depend on battery capacity and temperature. (A typical engineering figure: a 50–60 L 12 V compressor fridge often uses ~30–50 Ah/day in operation (www.autoroamer.com).)
Absorption Refrigerators (Gas/Dual-Power)
“Absorber” refrigerators use a heat source (propane, propane 12V heater, or 120 V AC) to drive an ammonia absorption cycle, with no moving compressor. Their big advantage is silence (no compressor noise) and the option to run on propane gas. This is valuable offline: with a filled gas canister you can run indefinitely without draining batteries. However, absorption units have important limitations:
- Leveling: They must be nearly horizontal (within a few degrees) to work correctly (blog.campcruisers.com). A sloped camp spot can upset the internal liquid flows and damage the unit. Always level an absorption fridge carefully.
- Cooling Speed: They cool much slower than compressor fridges. It can take many hours to reach low temps, so always pre-cool before a trip. They may struggle to keep 40°F when ambient climbs above ~85–90°F (blog.campcruisers.com) (www.nkc.nl).
- Efficiency: On electricity, they are very power-hungry. Driving the heating element on 12 V is like running a portable heater; it draws tens of amps continuously. (Indeed, RV lore warns the 12 V mode is only for “while driving on the alternator” (www.camperupgrade.com).) On propane, efficiency is better, but a large burner still uses ~1000–2000 BTU/hr (12–24 kBTU per day if running full-time). A 20 lb propane tank (~430,000 BTU) might last only a week or so on continuous run, depending on duty cycle. (www.camperupgrade.com)
- Ventilation: Absorber fridges generate waste heat via a small burner (or electric heater). They must have a proper flue (chimney) and vents for combustion air. Any enclosure must allow airflow over the entire refrigerated “radiator” coil at the back. In practice, RV/camper installs have top and bottom exterior vents. These vents must be kept clear – snow, leaves, or insects blocking them will reduce cooling or shut it off (www.nkc.nl). In a lakeside cabin, check that the vent chutes are protected from rain and debris and that the chimney stays clean.
- Humidity Impact: High humidity makes design issues worse. Moist air around the hot flue can condense on cooler surfaces, and damp conditions accelerate corrosion. In practice, absorption units in damp climates need frequent checks of burners and flues. (Dry climates aside, one campsite advice site specifically notes that high humidity “promotes mold and mildew” on appliances and accelerates seal degradation (flamingoappliance.com).)
Ventilation and Leveling Rules
Regardless of type, never install a fridge without clearance. A compressor fridge sheds heat via condenser coils (rear or bottom). Ensure at least a couple of inches of air space around the back and above, or a damper panel if built-in. Even shaded, humid air can only take so much heat; a hot fin coil in a cramped cabinet will reduce efficiency. For absorption fridges, both the combustion vents and condenser panel need airflow: one intake (low vent) for combustion air and one exhaust (flue) for hot gases. Periodically inspect vents to confirm no blockage from leaves, nests or corrosion (www.nkc.nl).
Leveling matters mainly for absorbers: keep it within ~0–3° of horizontal (blog.campcruisers.com). Periodically use a small level on the floor or shelf under the fridge. For compressor units, check only that the fridge sits securely (excess vibration can wear doors loose in a mobile setting, for example).
Power Use and Thermal Management
Daily Amp-Hour Draw
With no grid power, you must size batteries (often with solar) for your fridge draw. The key point: ambient temperature dramatically changes consumption. Studies show the compressor’s duty-cycle rises steeply with heat (www.autoroamer.com). As a rule, expect about a one-third duty cycle (compressor running ~8 hours/day) at ~70°F, but closer to 50% (12 hours/day) at ~100°F (www.autoroamer.com). In concrete terms, a typical mid-size (40–50 L) 12 V compressor fridge might draw roughly 20–30 Ah per day at moderate temperatures and 30–50 Ah by the time it’s hot. For example, one source summarizes small (25 L) fridges using ~200–300 Wh/day (≈16–24 Ah) in mild weather, rising to ~300 Wh (≈24 Ah) in heat (www.autoroamer.com). A 45 L fridge can run ~26–42 Ah/day (≈320–520 Wh) from cool to warm conditions (www.autoroamer.com). (Manufacturer specs back this up: Dometic’s portable fridges are on the order of 0.85–0.9 Ah per hour at ~90°F – roughly 20–22 Ah per day (www.autoroamer.com).)
As a numerical example: suppose you have a 100 Ah lithium battery (≈80 Ah usable). At 25 Ah/day draw, it lasts ~3 days; at 40 Ah/day, ~2 days. If your campsite is often warm, design for the higher end of draw. Using our numbers, a fully charged 100 Ah battery at 50% useful depth (40 Ah) could run a 40 L fridge about 2–3 days in hot weather, whereas at 25 Ah/day (cooler shade) it might run ~3–4 days (vanpowercalc.com) (www.autoroamer.com). The exact math is: hours = (Usable Ah) / (Ah per day) × 24. In any case, it’s wise to oversize solar/battery if feasible, especially under consistently humid warmth.
Thermal Mass and Packing Strategies
You can buffer fridge loads by adding cold mass and packing carefully. Every time warm food or a warm drink goes in, the compressor chases a higher load. Instead:
- Pre-cool as much as possible. Refrigerate or freeze foods (and even the fridge if empty) before heading out.
- Use ice bottles: Freeze water bottles or improve cold packs take up volume that stays cold longer than air. In a compressor fridge, bottles of cold water act like a “cold battery” similar to a chest freezer model (fridge0.branchable.com). Keep a few gallon jugs frozen and replace them from dry ice as needed.
- Keep it full: A fuller fridge has more thermal mass. Use empty space to store sealed bottles or ice packs instead of air. Don’t pack beyond manufacturer shelves, but minimize void space.
- Limit warm air: Open the door as rarely as possible. Plan meals to take out everything needed, then close quickly. In campers or picnics, use a two-cooler strategy: one for drinks and perishables you access often (possibly with block ice), and another for long-term storage. Etching a checklist and grabbing all items in one go can cut cycle-on time significantly.
- Cover and shade: Keep the unit out of direct sun (even through windows). If outside, set it on a stand to allow air underneath, and consider wrapping the cabinet in a reflective blanket or insulated cover to reduce solar heating. An ideal setup is in the shade with a light-colored cover when parked. Even small actions help: for example, orienting the outside panels to a breeze or using a portable battery fan to blow air over the condenser can shave off a bit of energy.
- Stagger loading: If space allows, make a cold compartment (e.g. a cooler block) where you put newly opened warm items first before transferring them inside the fridge. In other words, don’t dump entire crates of warm food directly in; let them cool a bit in ice first.
Together, these tactics help smooth out peak draws. For example, adding a few frozen 2-liter bottles might cut total compressor run-time on a hot afternoon by reducing how often it needs to kick in. Every ten-degree lower ambient temperature will also halve the fridge’s workload, so anything that keeps the interior colder (thermal mass, insulation, shade) multiplies into energy savings.
Food Safety and Fish Storage
General Perishable Handling (Timeline)
Even the best fridge must follow food-safety rules. The USDA and FDA emphasize the “Danger Zone” of 40–140°F, where bacteria multiply rapidly. In fact, pathogens can quadruple in just 30 minutes at 90°F, so a general rule is 2 hours maximum out of refrigeration (just 1 hour if it’s above 90°F) (www.fsis.usda.gov). In simple terms: keep perishables below 40°F at all times. When camping or boating, pack perishables frozen or on ice and get them into cooling as fast as possible (www.fsis.usda.gov). Use the cooler as the refrigerator and replenish ice if travel or power is off.
For on-board refrigeration, assume discard after time if control fails. According to the USDA: “If using a cooler, leftover food is safe only if the cooler still has ice in it. Otherwise, discard leftover food” (www.fsis.usda.gov). In other words, if ice melts and food warms above 40°F, throw it out. At a fridge cabin, similarly discard anything when the fridge or cooler cannot maintain 40°F.
As a quick reference (per USDA/DIY charts):
- Raw poultry or ground meats: 1–2 days in fridge at 40°F, then cook or freeze (hgic.clemson.edu).
- Beef, pork, lamb cuts: 3–5 days refrigerated, then freeze or cook.
- Eggs (fresh, in shell): up to 3-5 weeks refrigerated (store away from door, ideally ~37°F).
- Dairy (milk, soft cheeses): use within 1 week of opening.
- Cooked leftovers: 3–4 days max in fridge (then freeze).
- Delicatessen meats: 5–7 days in sealed fridge.
- And always rinse produce and keep raw meats below cooked foods to avoid cross-contamination (www.fsis.usda.gov).
Fish After the Catch
Fresh-caught fish need prompt chilling. A 4–5 day supply of ice should be brought on any trip (hgic.clemson.edu). Immediately upon catch, gut and clean the fish, removing internal organs: the flesh is almost sterile, but the gut cavity harbors bacteria. Rinse thoroughly in lake water (away from contamination sources) or potable water to wash off slime (hgic.clemson.edu). Then ice it down. The best practice is a slush-ice bath: mix clean crushed ice with a little (even salted) water and submerge the fish (hgic.clemson.edu). If a slush tank is unavailable, pack whole fish in crushed ice (covered top-to-bottom), replacing ice as it melts (hgic.clemson.edu). The goal is to drop the fish temperature immediately towards 32–38°F.
After icing, fillet at destination as soon as feasible. Store cleaned fish on ice inside the cooler. According to marine experts, properly cleaned and iced fish can stay good about 4–5 days with minimal quality loss (hgic.clemson.edu). Once in a refrigerator, consume fish within 1–2 days, or transfer to a freezer (hgic.clemson.edu). In practice, many anglers aim to eat freshwater fish within 24–48 hours of catch for optimal flavor. Always wrap fish in moisture-proof paper or bags and store at the coldest part of the fridge (as close to 32°F as possible) (hgic.clemson.edu).
Remember to sanitize surfaces and hands after handling raw fish. Our backup tip: in a pinch, you can also cure or smoke fish to extend shelf life, but that’s beyond scope here.
Packaging and Serving
When packing food (meat, dairy, etc.), use sealed containers or freezer bags inside the fridge to keep moisture out. Keep raw meats at the bottom of the cabinet or in a separate small cooler/cooler shelf to prevent drips onto ready-to-eat foods (www.fsis.usda.gov). Use tight lids and minimize empty air space inside containers. Also portion out what you’ll eat each day; rather than keeping a large jar of mayo or milk that’s repeatedly opened (and heated), bring single-serve packets or stick the jar in a small cooler.
If you have leftovers or cooked food: cool them quickly (e.g. by splitting into shallow containers) and refrigerate. USDA guidelines say cool to 40°F within 6 hours and then use within 3–4 days (guilford.ces.ncsu.edu). Beyond four hours at 135°F (for hot foods) or two hours in the danger zone, the food becomes unsafe (www.fsis.usda.gov). In the wild, it’s often safest to cook only what you will eat, or finish all cooked food at one sitting.
Backup Cooling Methods
Even the best off-grid fridge can fail (power outage, battery flat, etc.). Have a backup plan:
-
Insulated Coolers: Always pack a sturdy cooler or two. Hard-sided coolers (polyethylene or foam) provide extra insulation. Pre-chill them with ice or frozen packs before loading. For extended trips, consider a four-quarter ice strategy: freeze water in jugs or gallon milk containers (these are free and safe) to make large ice blocks. These melt slower than cubes. According to USDA camping advice, a solid block of ice keeps contents colder longer than cubes (www.fsis.usda.gov), so fill containers with water and freeze. At camp, fill coolers with alternating layers: start with a 3″ deep layer of block ice, then alternate food and ice. Pack drinking bottles in between to use as cold mass. Cover the cooler with a blanket or reflective tarp and keep it in the shade or in an insulated box. A cooler on the forest floor should be elevated if possible (place on wood or stand) to avoid ground heat. If you have a solar panel and portable 12V cooler, those can double as backup (using any spare battery power).
-
Ice Procurement: In remote areas, plan ice logistics. If home-base is a trailhead or town, bring big frozen bottles along. Identify local stores or marinas selling block ice – these often last longer. If staying for days, you may need to make periodic runs for ice. Portable generators or solar-charged freezers can allow you to make your own ice; even a small chest freezer fed by a few solar panels can produce block ice each night. In very humid areas, consider dry ice (frozen CO₂) for emergencies – it lasts much longer (dozens of hours) but requires careful handling (gloves, venting).
-
Evaporative Cooling (no ice): In extreme bind, an improvised “Zeer pot” (clay pot cooler) can keep root vegetables or some foods cool by evaporative cooling, but it won’t reach refrigeration levels. Not as reliable as ice, but worth mentioning if no other cold source exists.
-
Discard If Spoiled: As a failsafe, follow USDA’s bottom line: If you ever doubt a food’s safety (e.g., it’s been warm too long), throw it out. It’s far safer to waste food than to risk picnic food poisoning.
Maintenance Checklist (Humidity Matters)
Lakeside humidity can corrode and foster mold faster than desert heat. Regular maintenance boosts reliability:
-
Condenser Coils/Cooling Fins: Clean monthly (especially in dusty or salty air). Dust, grime, or algae on coils makes any fridge run harder. In tropical climates, appliance pros recommend cleaning coils twice a year (flamingoappliance.com). Always inspect the coil area (behind or under the fridge) and clear any debris. For chest freezers and compressor fridges, use a brush or vacuum to remove lint and cobwebs from the grill or condenser.
-
Evaporator Drain: Many fridges have a drip pan or drain hole. Check that it’s clear so defrost water can flow to the pan. In humid sites, algae can plug the drain; if you see water pooling, push a small brush or pipe cleaner through the drain tube.
-
Door Gaskets (Seals): These rubber seals take a beating in humidity. Inspect them weekly. Clean mold and dirt from the folds: use warm soapy water or a 50/50 vinegar solution (refrigeratorsolve.com) (bleach will degrade the rubber). Absolutely avoid household bleach as it ages the gasket (refrigeratorsolve.com). After cleaning, dry completely. Test the seal by closing a piece of paper in the door – if it pulls out easily, the seal isn’t tight. In humid conditions, seals often warp or crack faster (flamingoappliance.com). Replace any gaskets that feel hard, cracked, or loose to ensure a tight seal. (A leaky seal means warm air and mosquitoes or ants get in, causing frost on inner walls and higher power use (refrigeratorsolve.com).)
-
Interior Cleanliness: Wipe down the inside regularly to prevent mold. Even a compressor fridge will get condensation if the seal is not perfect or is opened frequently in humidity. Remove any water that pools. Clean spills immediately and check corner crevices of shelves and drewls. A vinegar wipe monthly inside can slow mildew. Do the same for an absorption fridge’s interior.
-
Burner and Flue (Absorption units): If using propane, inspect the burner and flue yearly. Soot or insects can block combustion air. Make sure the chimney tube is clean; you can shine a light through it or check for rust flakes. Clean the burner assembly and chimney per manual (often with a soft brush). Also check cooling fins on the back radiator panel – dust and cobwebs here impair heat rejection.
-
Vent Covers: The vent grilles on the exterior (intake and exhaust) should always be clear. Routine tip: check in rain or snow that screens haven’t clogged with leaves or mold. As one RV advice site notes: “Check during winter that vent grills and the flue are not covered by snow, leaves or the like” (www.nkc.nl). In summer, inspect for wasp nests or mud (common in humid areas).
-
Electrical Connections: For 12V fridges, ensure battery cables are tight and corrosion-free. Damp can corrode terminals. You can apply a little dielectric grease on terminals to slow corrosion. For battery compartments of portable fridges, check for rust or leaks from corrosion. Also confirm that any battery venting on lithium setups is intact.
-
General Checks: Ensure the fridge is level (especially if moved) – absorption units need strict level. Listen for unusual noises (knocks or sloshing could mean a loose compressor or low refrigerant). Check the thermostat – if it’s turned colder than usual to achieve the same interior temp, something’s off.
This checklist should be run prior to a trip and then seasonally. A well-maintained fridge will handle the extra stress of humidity and humidity-induced mold better, maximizing reliability of your off-grid refrigeration.
Conclusion
Off-grid refrigeration at a humid lakeshore is manageable with the right equipment and practices. In summary: choose the right fridge for your power situation. A 12V compressor fridge will usually be more efficient and reliable (especially with battery/solar power), whereas an absorption fridge offers quiet gas operation but demands perfect leveling, vents, and fuel. Always ventilate or refrigerate properly, pack the fridge wisely (thermal mass, layering), and expect your daily battery draw to climb with each degree of heat (www.autoroamer.com) (www.autoroamer.com). Adhere to food-safety guidelines: minimize time in the danger zone (www.fsis.usda.gov) and use coolers or ice when needed (www.fsis.usda.gov). For caught fish, clean and double-ice them (hgic.clemson.edu) (hgic.clemson.edu) and eat or freeze them within 1–2 days (hgic.clemson.edu). Subject to these precautions — and diligent maintenance of coils and seals in damp air (flamingoappliance.com) (refrigeratorsolve.com) — you can keep your food safe and enjoy the catch of the day even far from hookups.