 Auto
Auto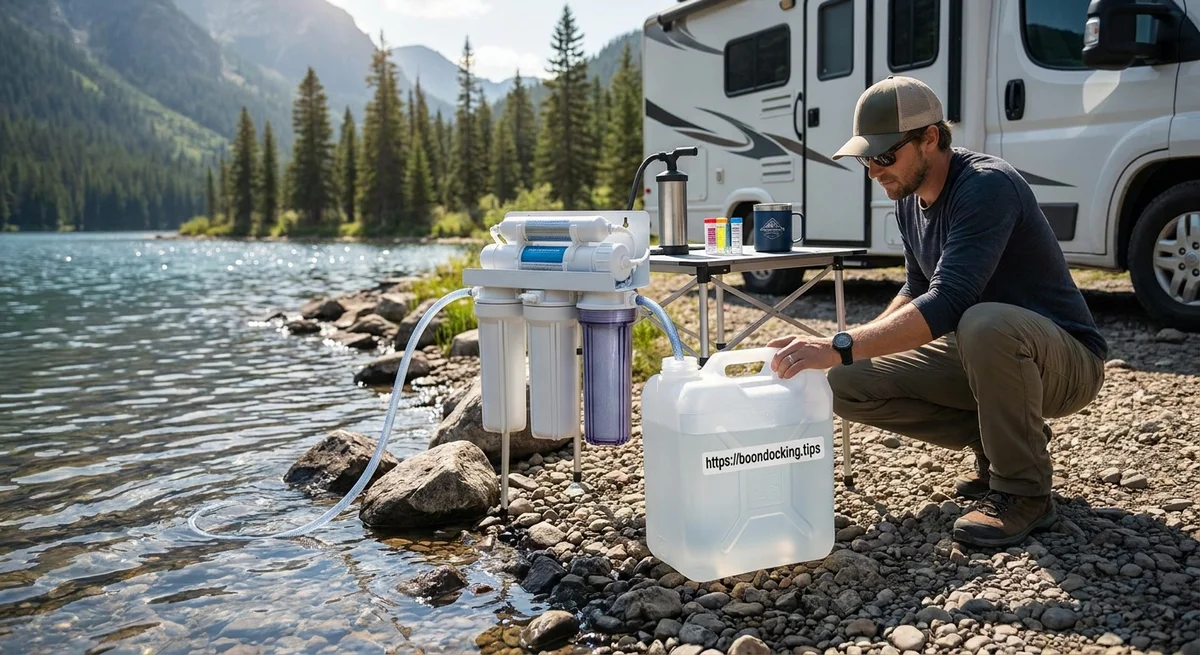
Water Safety 101: Treating Lake Water for RV Boondocking
When boondocking (camping off-grid) in an RV, lakes are a tempting source of fresh water – but “wild” lake water is rarely potable without treatment. Untreated lake water can harbor a variety of hazards: bacteria (e.g. E. coli, Salmonella), viruses (e.g. norovirus, hepatitis A), protozoan parasites (e.g. Giardia lamblia, Cryptosporidium), plus sediment/turbidity and chemical/toxic pollutants (algal toxins, pesticides, heavy metals). For example, guides note that lakes often contain E. coli and Salmonella from animal waste, waterborne viruses from sewage runoff, Giardia or Cryptosporidium from beavers and other wildlife, as well as agricultural runoff and algal toxins (outdoorovernights.com) (outdoorovernights.com). Ingesting these can cause severe gastrointestinal illness, dehydration or worse (e.g. liver damage from blue-green algal toxins) (outdoorovernights.com) (outdoorovernights.com). Notably, cryptosporidium cysts are very hardy – they are resistant to ordinary chlorine – so they require boiling or fine filtration (www.cdc.gov) (footstepsintheforest.com). In short, all lake water should be assumed unsafe until proven otherwise.
Even before treating it, choose your intake carefully. Never scoop from the shoreline or shallow edges, where animal or human waste and runoff concentrate. Instead draw water a short distance from shore in open water (mid-depth or surface, away from inlets/outlets and obvious algae). As one camping guide advises, pick water from “clean and flowing” sections and avoid stagnant or visibly contaminated areas (outdoorovernights.com). If possible, use a floating filter intake or weighted tube to draw from just below the surface. Always collect water into a clean container or bucket, letting large sediments settle out first.
Risks in Lake Water
Turbidity/Sediment. Murky water (high turbidity, clay or organic debris) signals higher risk. Sediment can physically carry pathogens and chemically clog filters or block UV light. Water with >5 Nephelometric Turbidity Units (NTU) is generally too cloudy for reliable UV or chemical disinfection — one guide notes that if you can see your hand at arm’s length through the water, you’re probably under ~5 NTU (www.hikehydrated.com). In very muddy water, pre-treat by cloth pre-filter or settling: let the water sit in a bucket or use a primitive clarification (flocculant) step so heavier particles drop out. This prevents rapid clogging of fine filters and allows UV to work.
Protozoa – Giardia & Cryptosporidium. These parasites form tough cysts and are among the main concerns. Giardia (“beaver fever”) is common in wilderness lakes and causes weeks of diarrhea if untreated. Cryptosporidium (“crypto”) causes similar illness and can be especially dangerous for vulnerable people. Effective removal requires filtration to ≤1 micron or inactivation by heat or UV: e.g. boiling at a rolling boil for 3 minutes (or 1 minute at sea level) reliably kills both (www.cdc.gov) (footstepsintheforest.com). UV-C also neutralizes both quickly, and 0.2–0.3 µm filters (hollow-fiber or ceramic) will physically trap the cysts. Notably, Cryptosporidium is poorly inactivated by chemical disinfectants like chlorine or iodine (www.cdc.gov) (footstepsintheforest.com), so do not rely on those alone for crypto.
Bacteria – E. coli, Salmonella, etc. Fecal coliforms like E. coli (including harmful strains like O157) are common from wildlife or human sources. These bacteria are killed readily by boiling, UV, or standard filters. For example, a 3-minute boil or 1-micron filter will eliminate E. coli, and chemical disinfectants (bleach or chlorine dioxide) also inactivate it quickly (footstepsintheforest.com) (footstepsintheforest.com). In practice, E. coli serves more as an indicator of fecal contamination (“If you find E. coli, assume other nasties are present too.”). Always err on the side of treating any water that might harbor fecal bacteria.
Viruses – Norovirus, Hepatitis A, etc. Viruses can occur if sewage (human or animal) has fouled the water. Most lightweight filters (hollow-fiber, ceramic) do not remove viruses – their pores are too large (~0.2 µm) to trap viruses (~0.02–0.1 µm) (www.hikehydrated.com). However, UV disinfection and chemical purifiers do neutralize viruses. For example, UV units (SteriPEN, etc.) are certified to kill >99.9% of viruses in a liter by irradiation, and chlorine dioxide kills them in ~30 min (www.hikehydrated.com). If viruses are a concern, use one of these methods or a filter combined with UV/chemical disinfection.
Cyanobacterial Toxins (Algal Toxins). A serious hazard in some lakes is toxic blue-green algae (cyanobacteria), which may produce microcystins, anatoxins, cylindrospermopsin and other hepatotoxins/neurotoxins. These are not living organisms but dissolved or cell-contained chemical poisons. Most portable treatments cannot reliably remove dissolved toxins. Boiling and ordinary chlorination will kill algae cells but can release more toxin from the cells. The EPA notes that conventional treatments struggle with high toxin levels and advise activated carbon adsorption for many cyanotoxins (www.epa.gov) (www.epa.gov). In practice: avoid water with visible algae scum or a “pea soup” layer, and if forced to use it, aggressively filter and pass through activated carbon. Remember that filters alone may only remove the algae cells (intracellular toxins) and not dissolved toxin (www.epa.gov). In short, if blue-green blooms are present, the safest choice is to find another source; no simple field filter guarantees toxin removal (backpackinglight.com) (www.epa.gov).
In summary, lake water poses all types of contamination risks. A multi-barrier approach is essential. Below we compare different water treatment strategies suitable for boondocking.
Treatment Methods Compared
1. Multi-Stage Filtration + UV/Pump Systems: The ultimate safety comes from combining steps. A typical rig might be: settling + cloth prefilter → 5-micron sediment filter → activated carbon block → UV sterilizer. Water is drawn by a pump (often 12V RV pump or hand pump), flows through the stages, and is treated on-the-fly.
-
Flow Rate & Power: With a 12V pump (1–2 GPM ≈ 4–8 L/min) you can fill tanks or containers quickly. UV units (e.g. a 12V Sterilight or AquaRanger) typically run at a few watts and purify at ~2–3 L/min (commercial units up to 5 L/min). Nozzles and hoses are back-pressure rated for 50–100 psi. A drawback is power: the pump and UV lamp need battery/shore power or solar charging.
-
Consumables: Replaceable filters (sediment and block) and carbon; UV lamp (life ~10,000 L or 8000 activations for SteriPEN) and quartz sleeve cleaning. Activated carbon should be replaced when it stops adsorbing taste or after a few hundred liters.
-
Effectiveness: - Sediment (5 µm) removes most sand/silt (protects downstream filters).
- Carbon block removes many chemicals/pesticides and improves taste; importantly it also adsorbs some cyanotoxins like microcystins (www.epa.gov).
- UV irradiation (if water is pre-clear) kills all microorganisms: bacteria, protozoa, and viruses (www.hikehydrated.com). Mechanical filters took care of bacteria & protozoa, and UV covers viruses that filters miss.
-
Reliability: Very good if maintained, but dependent on electricity and equipment. Worst-case: if pump or UV fails, you have backups (see kit below). Requires more setup (hoses, spare parts). On the plus side, high throughput and can handle multiple pitchers/tanks at once.
2. Ceramic/Gravity Filters: Ceramic (or glass-fiber) gravity filters like the Katadyn Combi, Katadyn Base Camp, Big Berkey, etc., use gravity flow through ceramic and often an activated-carbon core.
-
Flow Rate & Power: No power needed; just fill the upper chamber and let gravity do the work. Flow is slower: typically 0.5–2 L/hour per filter element once water is flowing (often less initially until taps are open). For example, the Katadyn Base Camp offers steady gravity filtration but may require an hour to filter a few gallons (www.trailspace.com). By contrast, a pressurized ceramic/pump unit like Katadyn Combi yields ~1 L/min under pump (www.katadyngroup.com), but in gravity it’s much slower.
-
Consumables: Ceramic cartridges last thousands of liters (lifetime depends on water quality, often 1,500–6,000+ L) (www.katadyngroup.com). Most have a carbon core that needs periodic replacement (~every 400 L in the Combi) (www.katadyngroup.com). Cleaning old accumulations with a brush prolongs life. No batteries or fuel to carry.
-
Effectiveness: Ceramic depth filters with pore sizes ~0.2 µm trap bacteria and protozoa (Giardia, Crypto) (www.outdoorgearlab.com). The Combi filter’s 0.2 µm ceramic plus carbon stage, for example, “removes bacteria, protozoa, and other microorganism ops” (www.katadyngroup.com), plus chemicals via carbon (www.katadyngroup.com). Viruses are not removed by these (too small) – someone must use UV or chemicals downstream if viruses are suspected. Gravity filters excel at sediments: they gradually eliminate turbidity but do require that water has already settled a bit.
-
Reliability: Very reliable (no moving parts or batteries), but heavy and bulky (ceramic filters and stands can weigh several kg). They will clog if fed muddy water, so pre-settling or cloth pre-filter is still recommended. Good choice for basecamp or RV park use to produce large amounts of water, but less convenient for hand-carry backpacking. Users recommend always bringing a backup method in case the plumbing or cartridge leaks or is damaged (www.trailspace.com).
3. Chemical Purification (Chlorine Dioxide, Iodine): Chemicals come as tablets or drops that disinfect by oxidation. Katadyn Micropur and Aquamira are common chlorine dioxide options; iodine tablets are less favored (taste, limited protozoa efficacy).
-
Flow Rate & Power: These are batch treatments. Fill a container with collected lake water and add the specified dose of chemical. No external power needed. Weight is very low (a pack of pills or drops weighs a few tens of grams).
-
Treatment Time: Chlorine dioxide (ClO₂) is slowest: at 20 °C it kills bacteria in ~15 min, viruses in ~30 min, and Cryptosporidium in about 4 hours (www.hikehydrated.com) (even longer in cold water – up to 8–10 h near 40°F). Iodine is faster (15–30 min kill for bacteria) but still ineffective against Crypto (footstepsintheforest.com). Always allow at least the full recommended contact time in the user guide (typically 4 h for Crypto).
-
Consumables: One tablet per liter (Micropur MP1 does 1 L per tablet, 4 h contact, 4 ppm final ClO₂ (www.katadyngroup.com)). A 20-tablet pack treats ~20 L, costing ~$15. Tablets have a long shelf life (years). After treatment, no additional filtering is required (the water can be poured directly from the container).
-
Effectiveness: Chlorine dioxide in the recommended dose does inactivate bacteria, viruses, and most protozoa – but the long contact time is the drawback. Iodine is similar for bacteria/viruses but does not reliably kill Cryptosporidium (footstepsintheforest.com), so it should not be used alone if crypto is a concern. Chemicals do not remove sediment or toxins, and they may leave an aftertaste (ClO₂ is milder than iodine).
-
Field Reliability: Very high – no moving parts. Works in cold or murky water (unlike UV). One caution: plastic containers must be compatible (some tablets can cause pitting in aluminum). Always shake or stir during contact time. For drinking, some users prefer to run treated water through a carbon post-filter to remove taste.
4. Boiling: The simplest well-known method: heat water to a rolling boil.
-
Flow Rate & Power: Limit by your stove or fire. A typical stove might boil 1–2 L at a time, in 5–10 minutes. Boiling also concentrates any sediment and does not remove it, so ideally pre-filter first.
-
Effectiveness: Boiling kills all pathogens (bacteria, protozoa, viruses) if maintained properly. The CDC recommends a full rolling boil for at least 1 minute (at elevations above 6,562 ft, boil 3 minutes) to inactivate Crypto and other hardy organisms (www.cdc.gov). Note: boiling does not remove chemical toxins, and it won’t clarify turbid water (you’ll just have boiled mud).
-
Reliability: Extremely reliable if done correctly. Requires fuel (propane, wood) and cookware. It’s slow for large volumes (a 20 gal RV tank would take many hours of boiling and refilling, impractical in the field unless concentrated into small batches). Boiling is best as a backup or for small quantities (drinking cups, cooking water).
Comparison Summary: No single method is universal. Mechanical filters (hollow-fiber or ceramic) are instant and remove most microbes but need decent clarity and typically skip viruses. UV neutralizes viruses and residual protozoa in seconds but only in clear water. Chemical purifiers are lightweight and work in any clarity (except turbidity can slow them a bit) but require long wait times. Boiling covers everything alive but is fuel-intensive and slow. Combining methods (e.g. filter + UV, or filter + chemical) gives the broadest protection. Activated carbon adds a defense against organic chemicals and algal toxins, but it is not a standalone purifier (you still need a way to kill living pathogens).
A handy summary:
-
Mechanical Filter + Pump/Gravity – Instant flow (1–2 L/min with pump; ~0.5–1 L/min with hand pump; <0.05 L/min gravity), no power (hand), consumables: filter cartridges, carbon, long useful life. Best for removing sediment, bacteria, protozoa (Giardia, Crypto (www.outdoorgearlab.com)); viruses pass through; turbidity must be low (<5–10 NTU) (www.hikehydrated.com). Weight and bulk moderate to high.
-
UV Sterilizer – Fast (≥1 L per 90–120 seconds), needs battery or AC. Kills bacteria, protozoa, viruses effectively (www.hikehydrated.com). Requires very clear water (cloudy water blocks UV (www.hikehydrated.com)). No consumables except power.
-
Chlorine Dioxide Tablets – Zero flow (batch): treat 1 L per tablet. No power. 4 h contact for protozoa/Crypto (so plan ahead). Kills bacteria, viruses, protozoa (slowly) (www.hikehydrated.com). Leaves mild taste. Very reliable and long shelf life.
-
Boiling – Zero flow (batch): treat any amount, limited by pot size and fuel. Kills all germs if boiled ≥1 min (3 min for crypto) (www.cdc.gov). No cost except fuel. Does not remove solids or toxins.
By understanding these trade-offs – flow vs time, power vs simplicity, consumables vs reusables – you can tailor a system to your needs. (For example, an extended RV trip might favor a pump + UV rig for daily refills, whereas a short stay might use simply filter+chemicals or boiling each time.)
Intake Placement and Pre-Filtration
When collecting lake water, avoid shoreline edges and obvious sources of contamination. Do not dip your intake next to beaches (geese/swans congregate there), boat ramps, stagnant marshes, or inlets of runoff. Take water from open lake water, ideally a little distance from the shore. A floating hose intake or weighted tube that reaches 1–2 feet below the surface in open water is ideal. Minimize splashing to avoid sucking up surf and foul water.
Always use a pre-filter or settling step on any water that looks muddy or has visible debris. A simple approach is:
-
Settling: Pour collected water into a clean bucket and let it sit undisturbed for 30–60 minutes. Larger particles will settle, leaving clearer water on top. Skim or siphon off the clarified water for treatment.
-
Cloth Pre-filter: Strain water through a bandana, cheesecloth, pantyhose or purpose-made sediment filter bag. This removes fine particles (dirt, algae clumps, leaves) and lengthens the life of your main filter.
These steps are especially important if you plan to use UV or fine filters. As noted, UV lamps become ineffective if water remains cloudy (www.hikehydrated.com). A little prep goes a long way: even homemade coffee filters ironically can remove enough debris to let UV or tablets work properly.
Shock Chlorination and Tank Sanitizing
If you’re storing lake water in your RV’s fresh water tank or plumbing, periodic sanitizing is wise. A common “shock chlorination” procedure is: Fill the tank, then add dilute household bleach to reach about 50 ppm chlorine (roughly ½ cup bleach per 15 gallons water, i.e. ~3 L bleach for 90 gal) (www.rvtechlibrary.com). Run the RV pump and open all taps until you detect chlorine smell in each fixture (this distributes the bleach through all pipes and valves). Let the solution sit in the tank and lines for at least 4–6 hours (some recommend overnight) (www.rvtechlibrary.com). Then drain and thoroughly flush the system with fresh water until no chlorine smell remains. This kills any residual microbes in the tank or plumbing. (EPA/health guidelines for well/tank chlorination are similar – they aim for 50 ppm for several hours (www.rvtechlibrary.com).)
After shock-treatment, you should also reload your filter/generally ensure your equipment is clean. Shock-chlorination is an emergency or seasonal step, not a daily means of purification (daily add-chlorine would be tedious). Instead, in normal operation rely on the filtration or chemical methods above.
Field Testing Options
It’s hard to see microbial contamination, but you can check some proxies:
-
Turbidity meter or test: A hand-held turbidity meter (NTU gauge) costs $50–$150 and instantly tells if water is very cloudy (e.g. >5 NTU would require settling). In the absence of a meter, a simple visual test is “Secchi disk” or seeing clarity: dip a white disc or just eyeball if you can see a submerged object (~1 ft down).
-
Test strips: Pool/spa test strips can measure free chlorine (to verify your shock chlorination dose) or total hardness if needed. Some strips detect nitrates/lead, but be cautious – these kits are not universally accurate for wilderness. There are also coliform/E. coli test kits (enzyme reagent tablets or rapid dip-sticks) that can indicate bacterial presence in an hour, but these are specialty items and may not be essential for casual boondocking users.
-
pH and color: Simple litmus strips or digital pens can show if the water has an odd pH (e.g. very alkaline or acidic) – useful if you suspect chemical runoff. A blue-green tint or scum indicates algae toxins, in which case it’s best to discard that water source.
Ultimately, in a pinch, sniff and look: if water smells sewage-ish or has a surface film, assume contamination and treat extra carefully or find another source.
Choosing a Method: Decision Guidelines
To boil it down (pun intended), here are some heuristic “decision trees” for different lake conditions:
-
Clear Alpine Lake (low turbidity, no visible bloom): You can rely on most methods. A basic filter (e.g. 0.2 µm pump filter or gravity filter) will handle sediment and microbes. Follow the filter with UV or tablets to kill any remaining viruses. If you have a UV pen and batteries, a liter in ~90s of treatment [27†L69-L77] is quick. Boiling also works reliably for gallons at a time. In short: mechanical + UV/boil/chem is ample for pristine water.
-
Murky or Silty Water: First settle and pre-filter vigorously. Use a coarse pre-filter and then a 5–10 µm cartridge if possible. Sand/grit will clog fine filters and ruin UV. Once much of the sediment is removed, you have choices: either filter through a hollow-fiber pump (which handles some turbidity if pre-filtered) or use chemicals (since tablets work even in opaque water). For example, one might let 20 L settle, pour through a bandana, then pump the water through a Sawyer or Katadyn. Alternatively, collect in jugs and treat with chlorine dioxide overnight. Do not use UV until water is mostly clear (see above).
-
Algae-Prone or Stagnant Lake: Best to avoid drinking from heavy-green lakes entirely. If no alternative, assume toxins: filter out algae cells (thick cloth) and treat for microbes. Then, if you have an activated-carbon filter or chemical adsorbent (like specialty carbon block or powdered carbon), use it to reduce dissolved toxins (www.epa.gov). For safety, consider multiple steps: e.g. pump filter → carbon filtration (such as a Berkey filter element or add carbon powder) → tablet or boiling. None of these guarantee toxin removal, so treat as a last resort and keep doses low.
These steps illustrate stacking methods to cover weaknesses. For example:
-
If viruses or floodwater suspected (e.g. lake downhill from a ranch): Always include UV or chemical steps, since mechanical filters alone won’t catch viruses (www.cdc.gov).
-
If Cryptosporidium is the top concern (water near elk/beaver): Boil or filter to 1 µm. Remember that Crypto resists normal chlorine (www.cdc.gov), so chemical-only is risky unless you wait 4+ hours with chlorine dioxide (www.hikehydrated.com) (footstepsintheforest.com).
-
If power is limited (no battery/solar): Rely on gravity+filter and chlorine dioxide or boiling. Ceramic gravity filters (e.g. Berkey) plus a chlorine tab is very robust.
In short: clear water → simplest method works; dirty water → combine settling + fine filter (mechanical) + disinfection (UV/chemical). Algae → treat as dangerous and use the most stringent and multi-step approach.
Pack List for Redundancy
A redundant water treatment kit (so you have backups if one part fails) might include:
- Pre-filter cloth/bandana or folded coffee filter. (for settling)
- Pump filter unit (e.g. Sawyer Squeeze or Katadyn Hiker/Combi) with spare cartridges or ceramic element. Includes hand pump or compatible hoses.
- Gravity filter (if weight allows, like a folded Katadyn Base Camp or two Berkey filters) or a collapsible filtration bucket.
- UV purifier (SteriPEN or battery-powered UV lamp) plus extra batteries/charger.
- Chemical tablets (Chlorine dioxide such as Katadyn Micropur or Aquamira, and a few iodine tablets for emergency).
- Boiling kit: Small camp stove or pot (if not already in RV kitchen) and cup.
- Test tools: Pocket turbidity meter or white Secchi disk/paper, chlorine test strips, and possibly an E. coli test kit (for thoroughness).
- Collection tools: Collapsible bucket or jug (5–10 L), funnel, gloves, and bleach/oral pipette for adding chemicals.
- Spare parts & consumables: Extra O-rings, tubing, filter gaskets, carbon block(s), and a field cleaning brush for pumps.
- Documentation: Dosage guidelines (bleach, tablets), and sinks for disposal. A waterproof notepad for recording test results if needed.
Being prepared means you can mix-and-match if water conditions change. For example, always carry at least two types of treatment: a pump filter and chemicals (and/or boiling fuel). This way if your filter clogs, you can still boil or chlorinate, and vice versa.
Conclusion
In RV boondocking, never assume lake water is safe. Plan ahead with layered purification: strain or settle out dirt, then kill or remove pathogens with filters, UV, chemicals or heat. Know the strengths and limits of each method: for instance, mechanical filters clear turbidity and microbes but miss viruses; UV kills viruses but needs clear water; chlorine dioxide works in cloudy water but needs hours of contact; activated carbon might help against oddly-tasting chemicals or cyanotoxins (www.epa.gov), but it is no substitute for disinfecting.
By placing your intake wisely, testing or observing the water’s clarity, and combining at least two treatment steps (e.g. filter + UV or filter + chemical), you can make lake water safe for cooking and drinking. When in doubt, over-treat: double the contact time or add an extra filter or some bleach. With the right gear, some patience, and these guidelines, you’ll stay hydrated and healthy while living off the grid.
**`.