 Auto
Auto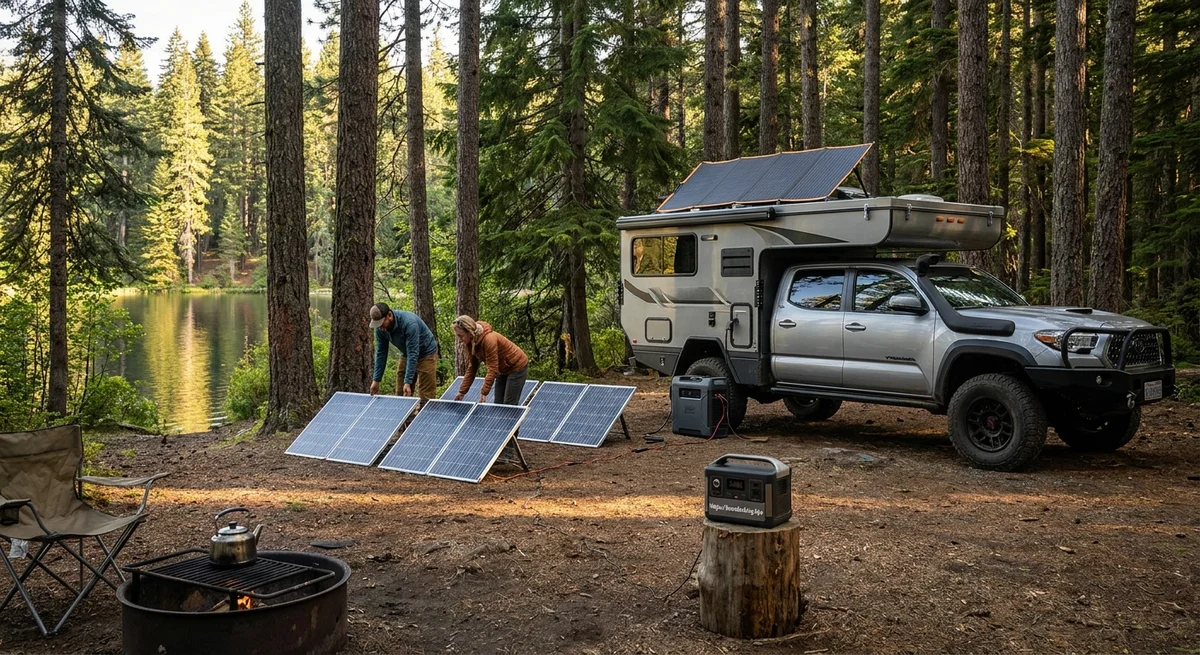
Powering an Off-Grid Lakeside RV: Solar in the Forest Shade
Camping by a quiet lake under a cathedral of trees is a dream – until you realize your solar panels barely see the sun. Dense tree canopy and morning fog can cut incident sunlight dramatically, forcing boondockers to rethink their solar setup. By understanding how shade and diffuse light affect PV output, and by planning smart panel placement and battery storage, even a shaded lakeside RV can achieve reliable off-grid power. This guide analyzes solar harvest under forest canopy, compares fixed rooftop vs portable panels, and covers tilt, water reflections, battery choices, load planning, and safety for an off-grid RV in a humid, lakeside setting.
Solar Harvest under Forest Canopy
In a forested lakeside campsite, shade and fog are the enemies of solar generation. Tree cover intercepts direct sunlight, and low clouds or mist scatter it. Although solar panels can still produce under cloud cover, output is much lower. One PV blog notes that on overcast or foggy days, panels may yield only 10–25% of their clear-sky output (en.tongwei.cn). In heavy morning fog or thick tree shade, plan on roughly a quarter of your panel’s rated power.
Shade is especially pernicious because a single darkened cell strings can drag down the whole panel. Studies of residential PV systems show significant power loss even with partial canopy shading; one review found that a relatively small shaded area (e.g. 20% shade) leads to noticeable dips in daily energy yield (digitalcommons.unl.edu). In practice, expect overall insolation under dense forest canopy to be far below open-sky values. A U.S. Forest Service primer on solar in woods notes that sunlight under trees follows an exponential drop-off, with direct sun nearly zero and only diffuse light reaching the understorey (www.sciencedirect.com). In broad terms, a sunny midsummer day at noon (1000 W/m² direct) might translate to only a few hundred W/m² of diffuse light in deep shade.
However, even scattered daylight adds up. PV cells respond to diffuse photons, so you’ll get some current. In fact, panels make some power in “low light” – roughly 10–25% of peak according to one manufacturer’s guide (en.tongwei.cn). To quantify your expected yield, it helps to monitor a sample day’s output once on-site. For modeling, assume that bright sun hours (peak noon) are cut in half or more after dawn until the canopy opens. For example, if an open-air 200 W panel yields ~1 kWh/day at this location, under forest shade you might only get 300–500 Wh/day.
Actionable tip: If possible, site your RV and panels where the canopy opens up by late morning. Sometimes roads or clearings at lake edge have less shade. Even a few extra hours of sun above the trees can double your generation. Portable panels can be moved to sunlit spots (see below).
Fixed Roof vs Portable Ground Panels
For an RV, solar panels are often roof-mounted or portable ground ― or a mix of both. Each has trade-offs. A recent analysis found that despite a portable panel’s convenience, fixed panels generally outproduce them. A 100 W portable module (at typical ~18–22% efficiency) often delivers only 80–90 W peak (because it lies flat and heats up), yielding about 0.4–0.45 kWh per day under strong sun (en.tongwei.cn). In contrast, a 400 W fixed (tilted) panel runs nearer 360–380 W peak, delivering about 1.6–1.8 kWh per day under optimal conditions (en.tongwei.cn). That’s roughly 4× the daily energy for 4× the panel area, thanks to better orientation, cooling, and higher efficiency cells.
Why the disparity? Portable panels heat up quickly and are hard to keep perfectly aimed. The study noted portable panels can reach 65–75 °C on a 25 °C day, whereas a ventilated roof panel stays closer to 45–55 °C (en.tongwei.cn). Each degree of extra heat cuts efficiency by ~0.4–0.5% (en.tongwei.cn). Portables also usually sit flat, missing roughly 15–20% of sunlight vs. a tilted panel (en.tongwei.cn). By contrast, fixed arrays can be angled toward the sun and benefit from back-side cooling and even higher-grade mono-crystalline cells. All told, the fixed panel’s yield was measured at about 87% of nameplate versus only ~45–90% for the portable (depending on conditions) (en.tongwei.cn) (en.tongwei.cn).
MPPT Charge Controllers: Whether fixed or portable, use an MPPT (Maximum Power Point Tracking) controller. MPPTs dynamically adjust to extract peak wattage from panels under changing light. This is crucial under partial shade or fog: MPPT will find the “sweet spots” in the I-V curve that produce the best power (en.tongwei.cn). In practice, an MPPT charger starting at 12–16 V input can harvest far more than a simple PWM regulator would. For example, if morning haze provides only diffuse light, MPPT can still capture whatever current is available, whereas non-MPPT systems risk logging constant partial charge that can damage lead batteries (sulfation).
Portable vs. Panel Count: It’s common to supplement a small roof array with one or two portable foldable panels. This can significantly increase total power on sunny days. For instance, adding a 100 W portable in direct sun (set up manually each morning) effectively adds ~0.4–0.5 kWh/day extra. If your roof only has 200 W installed, this easy addition can boost daily harvest by 50%. The key is placement: move the portable into full sun each day, keep it tilted with a stand, and avoid local shade (like parked vehicles or trees).
Panel Placement & Tilt: Water, Glare, and Albedo
Near Water: Placing panels lakeside can have benefits. Open water acts like a reflective surface, especially at low sun angles. A still lake can reflect up to 10–90% of early/late sunlight (glinting effect) depending on sun altitude. This Fresnel reflection can boost a panel’s rear- or side-illumination. In practice, casual studies of bifacial (double-sided) modules show that typical ground reflectivity (~10–15% for grass) adds about 5–8% more energy on the back side (en.tongwei.cn). Lake water reflectivity at midday is moderate (roughly similar to dark soil), but at sunrise/sunset it spikes. Thus a panel on the shore might get a small percentage gain from water albedo, although most monofacial panels see little rear side light.
Tilt Angle: Fixed and portable panels both benefit from tilting. The ideal tilt depends on latitude and season: roughly equal to the latitude is a common rule-of-thumb. Many RV boondockers leave panels flat in summer; one guide notes that across most of the U.S., “you can leave panels flat during summer and still receive plenty of solar energy” (rv-boondocking-adventure.com). However, tilting toward the sun (even seasonally) can boost charge. For example, a simple rule for winter is tilt ≈ (latitude × 0.9) + 24° (rv-boondocking-adventure.com). For a 40° N latitude campsite in winter, that works out to ~60° tilt, which packs more winter sun onto the module. A tilt stand or L-bracket lets you adjust panels daily or seasonally.
Even a small tilt helps keep panels clean. Near a lake, pollen, dirt, or bird droppings can stick to flat panels. An angle of at least 10–15° allows most rain to rinse debris off (pvom.jp). In high-humidity camps by forests or water, keeping panels angled also reduces stagnant water pooling (which can scratch or leak).
Glare and Orientation: At a lakeside RV park you may worry about blinding neighbors or boaters with reflected light. In practice, solar panel anti-reflective coatings and typical tilt send most light upwards (above eye level) during daylight (taiyoukou-navi.info). The worst glare is around sunrise/sunset, when you can simply adjust panel orientation away from heavily trafficked angles. It’s wise to position panels so they don’t directly face roads or nearby cabins.
A general tip: park your RV so the panels face south (in the Northern Hemisphere) when you settle for the day. One RV guide stresses orienting the RV so the solar side is southward for maximum daily sun (rv-boondocking-adventure.com). It even suggests parking curbside facing south if your fridge is on the street side – that way the fridge stays northward (cooler) and panels face true south. Whenever possible, position panels to avoid morning shade and to maximize their southern exposure.
Battery Choices: LiFePO₄ vs. AGM in Humid Conditions
Choosing the right battery chemistry is critical for lakeside reliability. LiFePO₄ (Lithium Iron Phosphate) batteries have become popular for off-grid, but AGM (Absorbent Glass Mat) lead-acid are still common. In humid or marine-like environments, LiFePO₄ generally outperforms AGM in longevity and moisture tolerance (bigteh.ru) (www.acebattery.com).
Key differences:
-
Cycle Life & Usable Capacity: LiFePO₄ can often endure 2000–5000 cycles (life measured to 80% capacity), whereas AGM is typically limited to 300–500 cycles (gridwright.com). Moreover, a 100 Ah LiFePO₄ battery can use nearly 100% of its capacity safely (~12.8 V nominal), whereas AGM should only be drawn to ~50% depth of discharge to avoid sulfation (gridwright.com). In practice, this means one 100 Ah LiFePO₄ (~1200 Wh usable) replaces roughly two 100 Ah AGMs (which only yield ~600 Wh usable). Detailed comparisons show LiFePO₄ delivers 2×–3× the usable energy for similar Ah ratings (gridwright.com), making it more compact and lightweight (roughly 1/2 weight for same usable energy).
-
Humidity/Corrosion: LiFePO₄ cells are sealed (usually IP54–IP67 rated) and do not off-gas in normal operation, so they handle humid air and tilt well (www.acebattery.com). In fact, a recent battery comparison notes LiFePO₄ units are often IP67-sealed and “saltwater-ready” for marine use (www.acebattery.com). By contrast, AGMs, while sealed, still vent tiny amounts of hydrogen/oxygen when overcharged, and their fiberglass mat can harbor moisture. High humidity accelerates lead-acid corrosion: a moisture study rated LiFePO₄ batteries as having “very high” moisture tolerance, while AGMs only “medium” (bigteh.ru). The biggest risk for LiFePO₄ in damp camps is corrosion of its metal housing (aluminum cases can oxidize), whereas for AGM the risk is surface leakage currents and lead plate corrosion (green oxide forming on posts) (bigteh.ru). In practice, LiFePO₄ terminals and busbars should still be inspected and coated (e.g. with petroleum jelly) to prevent corrosion, but they will far outlast an AGM in a muggy lakeside climate.
-
Charging Behavior: LiFePO₄ charges faster (often 2–3 hours for full charge with an MPPT), with ~95–98% efficiency (gridwright.com), compared to AGM (~6–8 hours, ~80–85%). Importantly, LiFePO₄ accepts partial charging without harm, whereas leaving an AGM only partially charged (common in short sun days) causes sulfation that degrades it (gridwright.com). If you expect gray, foggy mornings and only hit full sun a few hours at midday, LiFePO₄’s forgiving charging will keep it healthier. Do note, LiFePO₄ must not be charged below freezing (0 °C) without special care – but if you’re lakeside in summer, that likely isn’t a concern.
-
Safety: Both battery types must be fused and mounted securely. LiFePO₄ has very low risk of thermal runaway (it’s a very stable chemistry). AGMs have a risk of hydrogen gas when overcharging. Make sure AGM boxes are vented if tightly enclosed. LiFePO₄ usually include a built-in Battery Management System (BMS) that protects against over-voltage, over-current, and low temprature charging. Still, both should be secured to prevent tipping in a rolling RV, and terminals should be covered or insulated.
Given the moist lakeside, LiFePO₄ is generally the better choice for durable, maintenance-free storage (www.acebattery.com) (bigteh.ru). It is heavier on initial cost (~2–3× the $/Ah of AGM) but amortizes that with long life. AGM may suit if budget is very tight and use is extremely light and infrequent. If using AGM, plan to coat terminals with anti-corrosion spray and check water levels (if flooded type) often, as humidity accelerates self-discharge and decay (bigteh.ru).
Load Planning and Autonomy
Avoid surprises by doing a load audit. Make a simple chart of every appliance’s wattage, usage hours, and daily energy need. For example:
- Refrigerator (12V compressor): Modern 50–60 L 12V fridges typically use 0.3–0.6 kWh/day (www.faszinationcamping.de). (Older absorption fridges or larger units may use up to 1.0–1.4 kWh/day (www.faszinationcamping.de).)
- Ventilation Fans: Typical 12V fans are ~10–25 W each. If you run one 25 W fan for 8 hours, that’s ~200 Wh.
- Water Pump: A 12 V pump draws ~50 W at peak. If it runs intermittently (e.g. 1 hour total per day), that’s ~50 Wh.
- LED Lights: A 5 W LED bulb for 4 hours is 20 Wh. Even four of those (80 Wh) is still minor.
- Electronics Charging: Phones/laptops can add ~100–200 Wh/day if heavily used (e.g. 2 laptops for 4h).
As an example, a moderate boondocker’s daily tally might be ~500–800 Wh. The fridge is usually the single biggest consumer (~400–600 Wh). Fans and pumps often combine for ~200 Wh. Lights and devices may add another 100–200 Wh. If you heat water or cook off-grid, those are additional loads (often not electric in RVs).
With a load audit in hand, compute battery autonomy. “Autonomy” means how long your battery can sustain loads in zero sun. Use usable battery capacity (post-DOD). For instance, a 200 Ah LiFePO₄ (12.8 V) yields ~2560 Wh total; at 80% discharge safe, that’s ~2050 Wh usable. If your load is 700 Wh/day, that battery gives ~2.9 days autonomy. To be conservative, plan for 2–3 cloudy days of storage. In practice, sizing ~3–5 days of house loads is wise in a foggy forest. For AGM, double those amp-hours (since only ~50% DOD is safe).
Example Autonomy: Suppose 700 Wh/day use, 3 days of autonomy: need 2100 Wh usable. You could achieve this with ~175 Ah LiFePO₄ (12 V, usable ~2100 Wh) or ~350 Ah AGM (12 V, exploiting 50%, also ~2100 Wh out of 4200 Wh total). If weight is a concern and cost allows, LiFePO₄ is far lighter.
Remember to include inverter efficiency if using AC loads: a 90% efficient inverter effectively requires 10% more battery energy than your AC meter indicates.
Safety, Corrosion, and Security
Corrosion and Weatherproofing: Lakeside humidity and occasional splashes mean everything must be rugged. Use marine-grade materials where possible: stainless steel or aluminum racking (galvanic corrosion occurs if dissimilar metals touch). Protect all electrical connections. Use MC4 PV connectors rated IP67, and keep junction boxes elevated or sealed against moisture. For battery banks and controllers, choose boxes that shed water; apply silicone sealant to any bulkhead entries. A thin film of dielectric grease on battery terminals and panel wires can deter corrosion. Inspect all hardware periodically for rust or oxidation. If panels sit on foldable stands, rinse them off if they get sprayed with water or mud. Tilt panels sufficiently so rainwater drains off immediately (at least 15° if practical) to avoid stagnant water and algae growth.
Cable Sizing: In 12 V systems, voltage drop is a big concern on long runs. A portable panel placed far from the RV’s battery may produce less current if the wire is thin. Use thick-gauge cable (e.g. 8 AWG or 6 mm²) for any run over a few meters at multi-amp flows. As a rule of thumb, a 10 A draw over 10 ft of 12 AWG wire yields ~3% voltage drop, but double the length or halve the gauge and the drop doubles. Many ground-mount designs use 6 mm² (~10 AWG) to hold drop under 1–2% (en.tongwei.cn). Always fuse each string close to the source, and never rely on the mounting to ground for return – use the proper negative/ground wire.
Lightning and Tilt Safety: A tilted panel on a roof rack can act like a small lightning target. If a storm is imminent, either lay panels flat or disconnect them (remove cables or actuate any disconnect switch). Do not touch panels or wiring in a storm. Grounding is complex for portable rigs, but ensure your chassis is properly grounded to minimize potential differences. Never coil cables loosely (risk of inductive kick) and always shut off the system before servicing.
Theft Prevention: Portable panels are attractive targets. While there’s no foolproof solution, you can deter opportunistic theft. One recommendation is to secure panels with a steel cable lock (like a retractable Toy-Lok) threading through the panel’s handle and around the RV frame (www.etrailer.com). Some campers suggest placing a (fake) dog or a remote camera near conspicuous panels, and always keeping them in sight if possible (www.etrailer.com). When leaving camp for extended time, stow foldables away in the RV rather than leaving them unattended outside. At night, foldable panels should be secured in storage or locked up. Lastly, mark your panels subtly (engrave your name or license) so any stolen unit can be identified.
Conclusion
A forested lakeside setting poses real challenges for solar power, but with smart choices your RV can sip from the sun even in shade and mist. Use MPPT controllers, position panels for maximum open-sky exposure (even moving portables daily), and tilt them for better efficiency and self-cleaning. Exploit any water reflection sensibly, and be mindful of glare. Choose deep-cycle LiFePO₄ batteries for their long life and humidity resilience, and do a careful load audit to size your battery bank for several cloudy days. Always protect electrical gear from corrosion, properly gauge and fuse cables, and secure portable arrays against theft. With these measures, your RV can enjoy the serenity of the forest and lake – and still keep the lights on after dusk.